


Your Indoor Oasis: A Step-by-Step Guide to Setting Up Your Grow Tent

Your Indoor Oasis: A Step-by-Step Guide to Setting Up Your Grow Tent
So, you've decided to embark on the exciting journey of indoor growing! Whether you're a seasoned gardener looking to extend your season or a complete beginner eager to try your hand at cultivating indoors, a grow tent is your best friend. It provides a controlled, efficient, and discreet environment for your plants to thrive.
At The Green Corner, we know that setting up your first grow tent can feel a bit like building a mini-spaceship. Don't worry, it's easier than it looks! This guide will walk you through the essential steps, from assembling the frame to positioning your fans and lights for optimal plant growth.
Step 1: Choosing and Assembling Your Grow Tent
First things first, select a grow tent that fits your space and growing ambitions. Consider the dimensions and features. Once you have it, assembly is usually straightforward:
Follow the Instructions: Each tent is slightly different, but most involve a metal frame with poles and corner connectors. Assemble the frame first.
Attach the Fabric: Carefully pull the tent fabric over the frame. This might require a bit of stretching and zipping. Make sure the floor tray is properly installed at the bottom.
Location, Location, Location: Choose a cool, dry, and stable spot for your tent. Ensure it's near power outlets and accessible for tending to your plants.
Step 2: Essential Airflow: Extraction and Intake Fans
Proper ventilation is paramount in a grow tent. It helps regulate temperature and humidity, supplies fresh CO2, and removes stale air.
Extraction Fan (Exhaust): This is your workhorse, pulling hot, stale air out of the tent.
Position: Install your extraction fan at the top of the tent. Hot air rises, so placing it high makes it most efficient at removing heat. Connect it to an exhaust duct that leads outside the tent (and ideally outside the room, if possible). Many growers also connect a carbon filter to the extraction fan inside the tent to neutralise odours.
Intake Fan (Optional, Passive or Active): This brings fresh air into the tent.
Passive Intake: For smaller tents or those with powerful extraction, simply opening a lower vent on the tent might be enough. The negative pressure created by the extraction fan will naturally pull fresh air in.
Active Intake: For larger tents or more precise environmental control, install an intake fan at the bottom of the tent. This helps draw in cooler, fresh air more actively. Ensure your intake fan is slightly less powerful than your extraction fan to maintain a slight negative pressure, which helps contain odours and keep the tent walls from bulging out.
Step 3: Circulating Air with Clip Fans
Beyond intake and extraction, internal air circulation is vital to prevent stagnant air, strengthen plant stems, and reduce hot spots.
Position: Install clip fans inside the tent, aiming them above the plant canopy and between the plants, rather than directly at them.
Avoid: Blowing directly on plants can cause "windburn."
Aim For: A gentle, oscillating breeze that rustles the leaves and mimics natural outdoor conditions. Place them at varying heights as your plants grow.
Step 4: The Heart of Your Grow: Installing Grow Lights
Your grow lights are the most critical piece of equipment for plant growth. Proper placement is essential.
Hanging System: Most grow tents come with horizontal bars designed for hanging lights. Use sturdy ratchet hangers or light hangers to suspend your chosen grow light. This allows for easy adjustment of height as your plants grow.
Light Height: The ideal distance between your light and your plant canopy depends entirely on the type and wattage of your light (LED, HPS, fluorescent) and the stage of plant growth.
Always consult the manufacturer's recommendations for your specific light fixture.
As a general rule: Seedlings need less intense light (further away), while mature plants can handle more intensity (closer). Too close and you'll get light burn; too far and plants will stretch.
Reflective Surfaces: The tent's interior is already highly reflective, helping to bounce light back onto your plants. Ensure nothing is blocking this reflection.
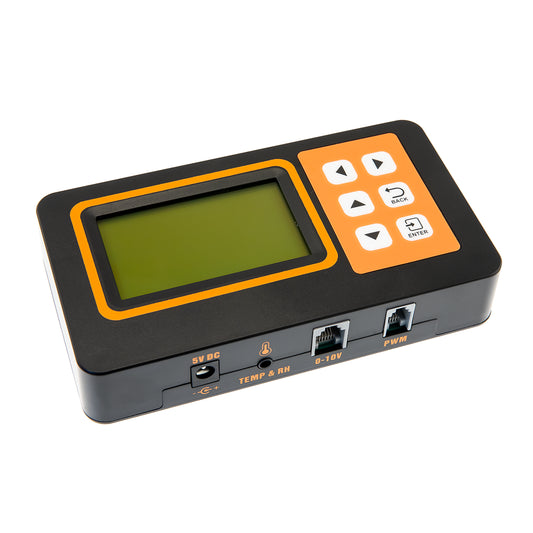
Step 5: Temperature, Humidity, and Monitoring
To truly dial in your environment, you'll need monitoring tools.
Thermostat/Hygrometer: Place a digital thermometer/hygrometer inside the tent, preferably near the plant canopy, to continuously monitor temperature and humidity levels. Many models also track min/max readings.
Timers: Use timers for your lights to ensure a consistent light cycle, which is critical for plant development. You might also use them for fans if you want to run them on an intermittent schedule.
Step 6: Final Touches
Power Strips: Use heavy-duty, surge-protected power strips for all your electrical equipment.
Tidy Cables: Use cable ties or Velcro straps to keep all your wires neat, safe, and out of the way.
Test Run: Before introducing plants, run your entire setup for 24 hours to ensure all components are working correctly and to stabilise your environmental readings.
Setting up your grow tent is an exciting step towards becoming a successful indoor grower. With careful planning and the right equipment from The Green Corner, you'll create a thriving environment where your plants can reach their full potential.
Happy Growing!